Servv Widget Shortcode Guide
The Servv plugin allows you to add a fully customizable event widget anywhere on your WordPress website using a simple shortcode.
How to Add the Widget
Follow these steps to display the widget:
- Open the page or post where you want the widget to appear.
- Click the
+button to add a new block and choose Shortcode. - Paste the following shortcode inside the block:
[servvai style="cyan" preset="light"]

styledefines the widget’s color theme.presetdefines the brightness mode (lightordark).
Widget Style Options
You can customize the widget appearance by changing the style and preset attributes in the shortcode.
Available Styles (style):
- blue
- green
- orange
- red
- purple
- light-red
- cyan
Available Presets (preset):
- light
- dark
Example Shortcodes:
- Light blue theme:
[servvai style="blue" preset="light"]
- Dark orange theme:
[servvai style="orange" preset="dark"]
Widget Settings
Accessing Widget Settings
Navigate to the Serve.AI Sidebar: Locate the Settings option in the Serve.AI menu on the sidebar. In the Settings dashboard, click on the Widget section to access the widget configuration options.
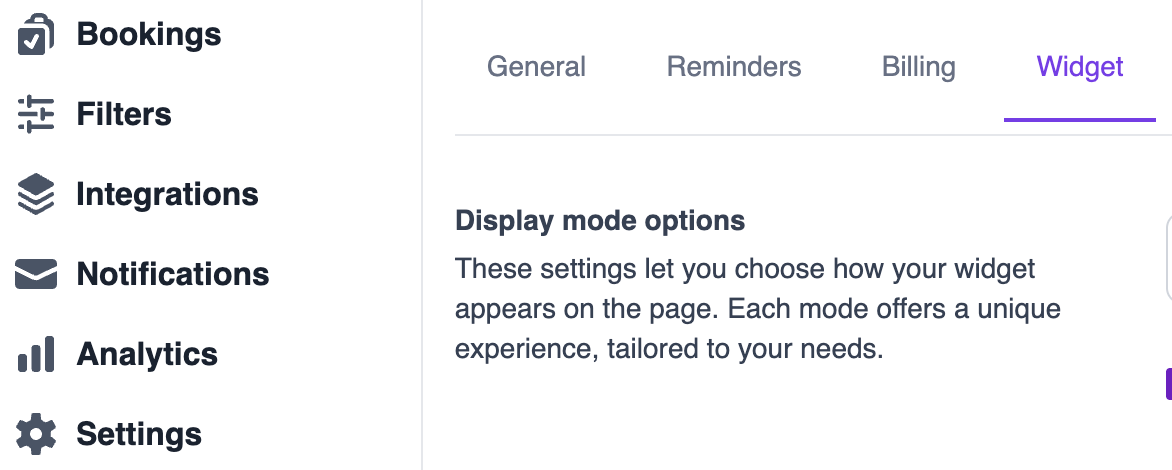
The widget settings are divided into four main categories. Display Mode Options, Item Settings, Filter Settings, and Additional Widget Display Settings. Each section is described below.
Display Mode Options
These settings allow you to control how the widget appears on the page, offering two layout options tailored to your preferences. Dropdown Menu:
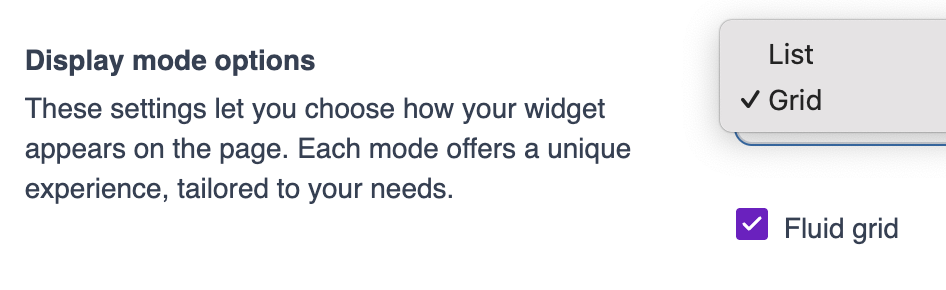
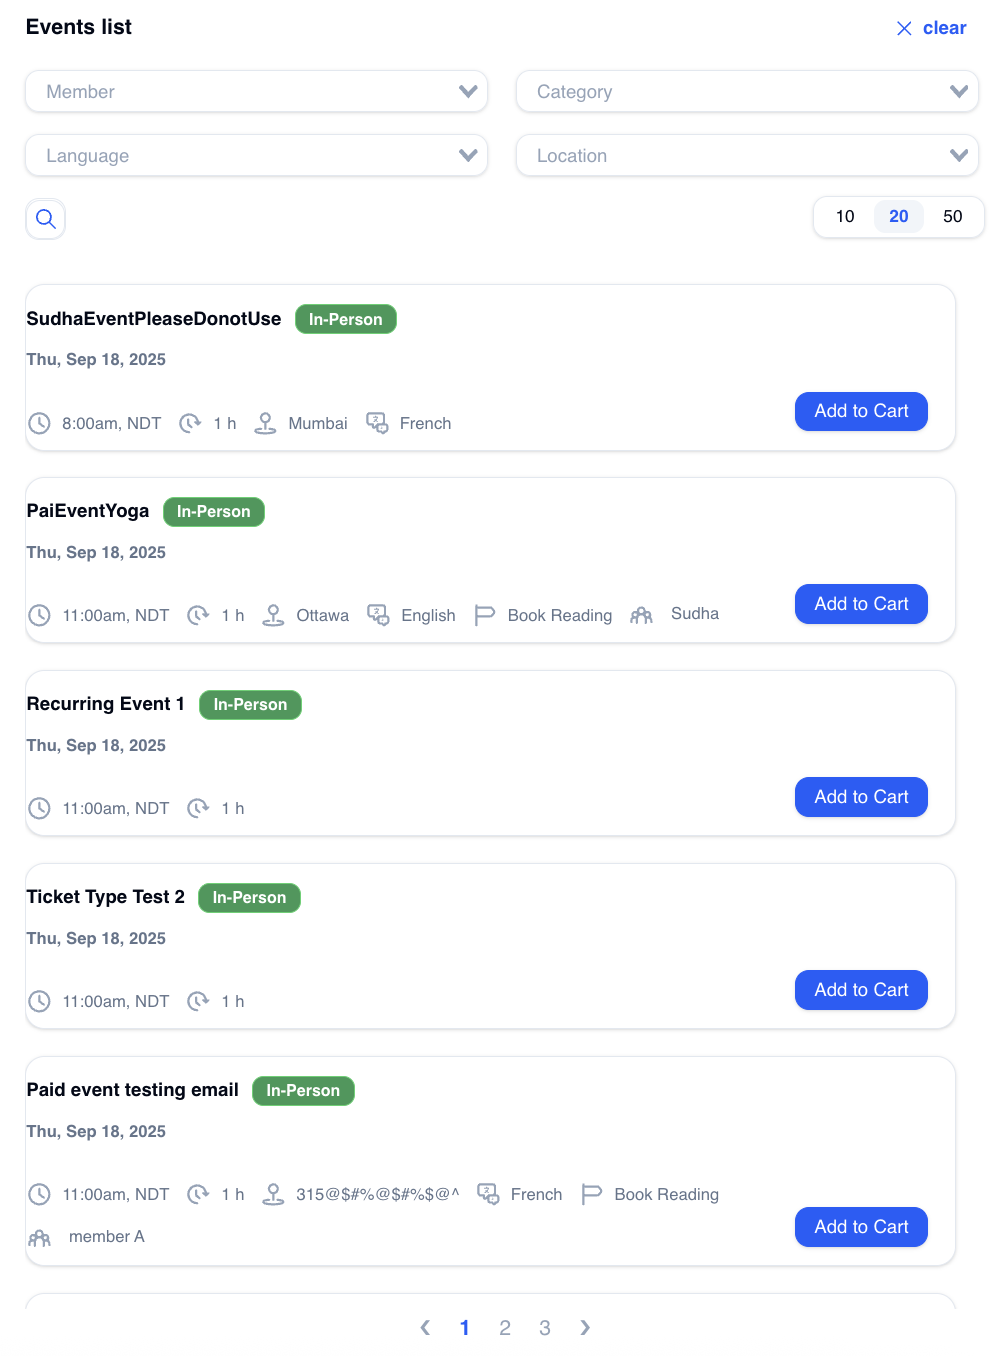
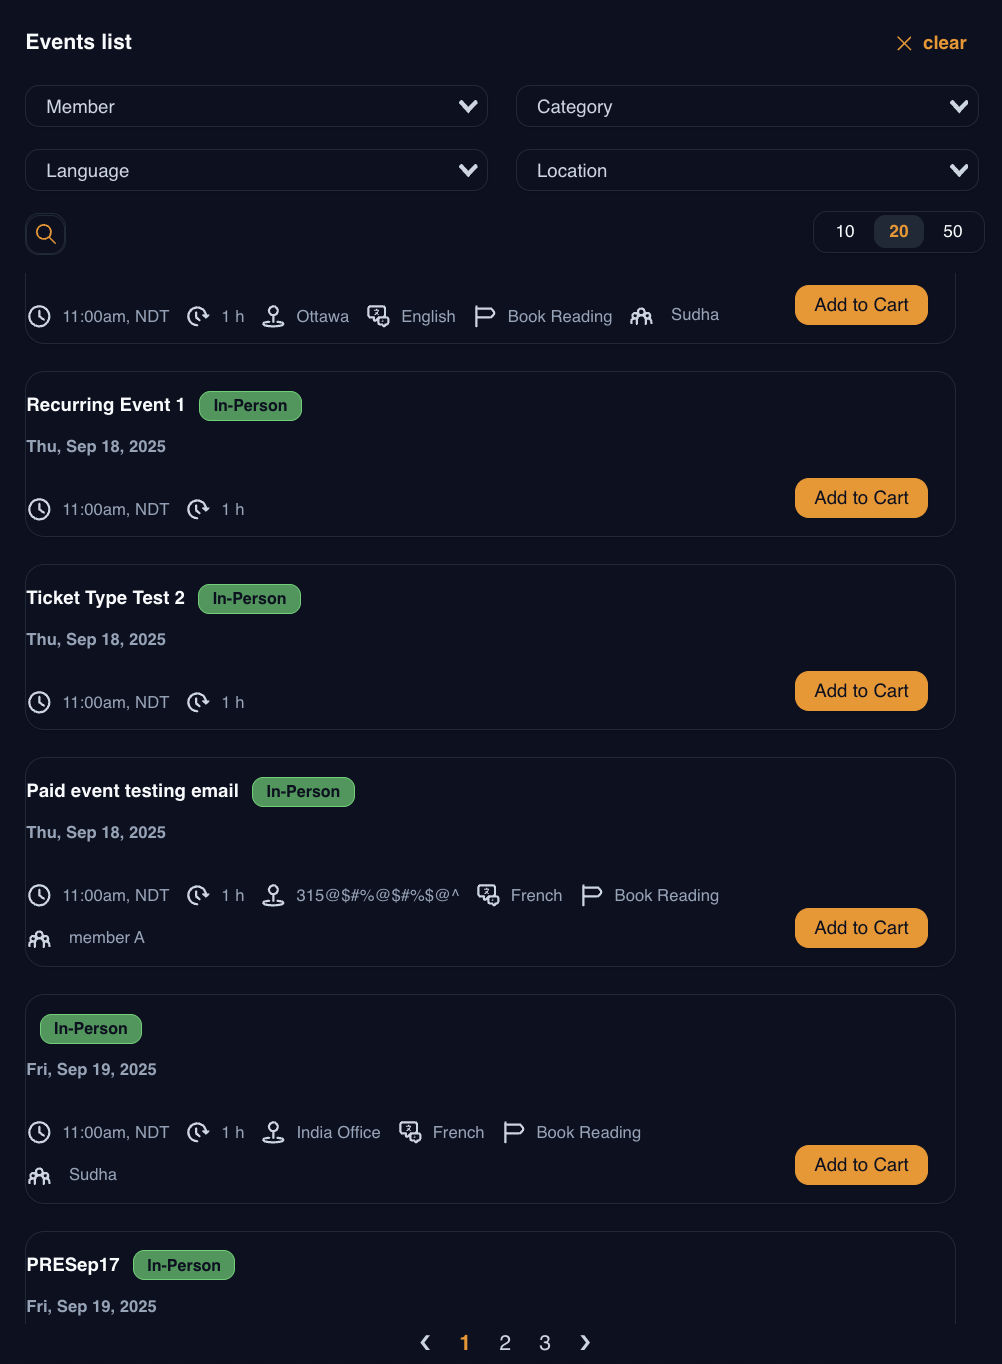
- Grid: Displays events in a grid layout.
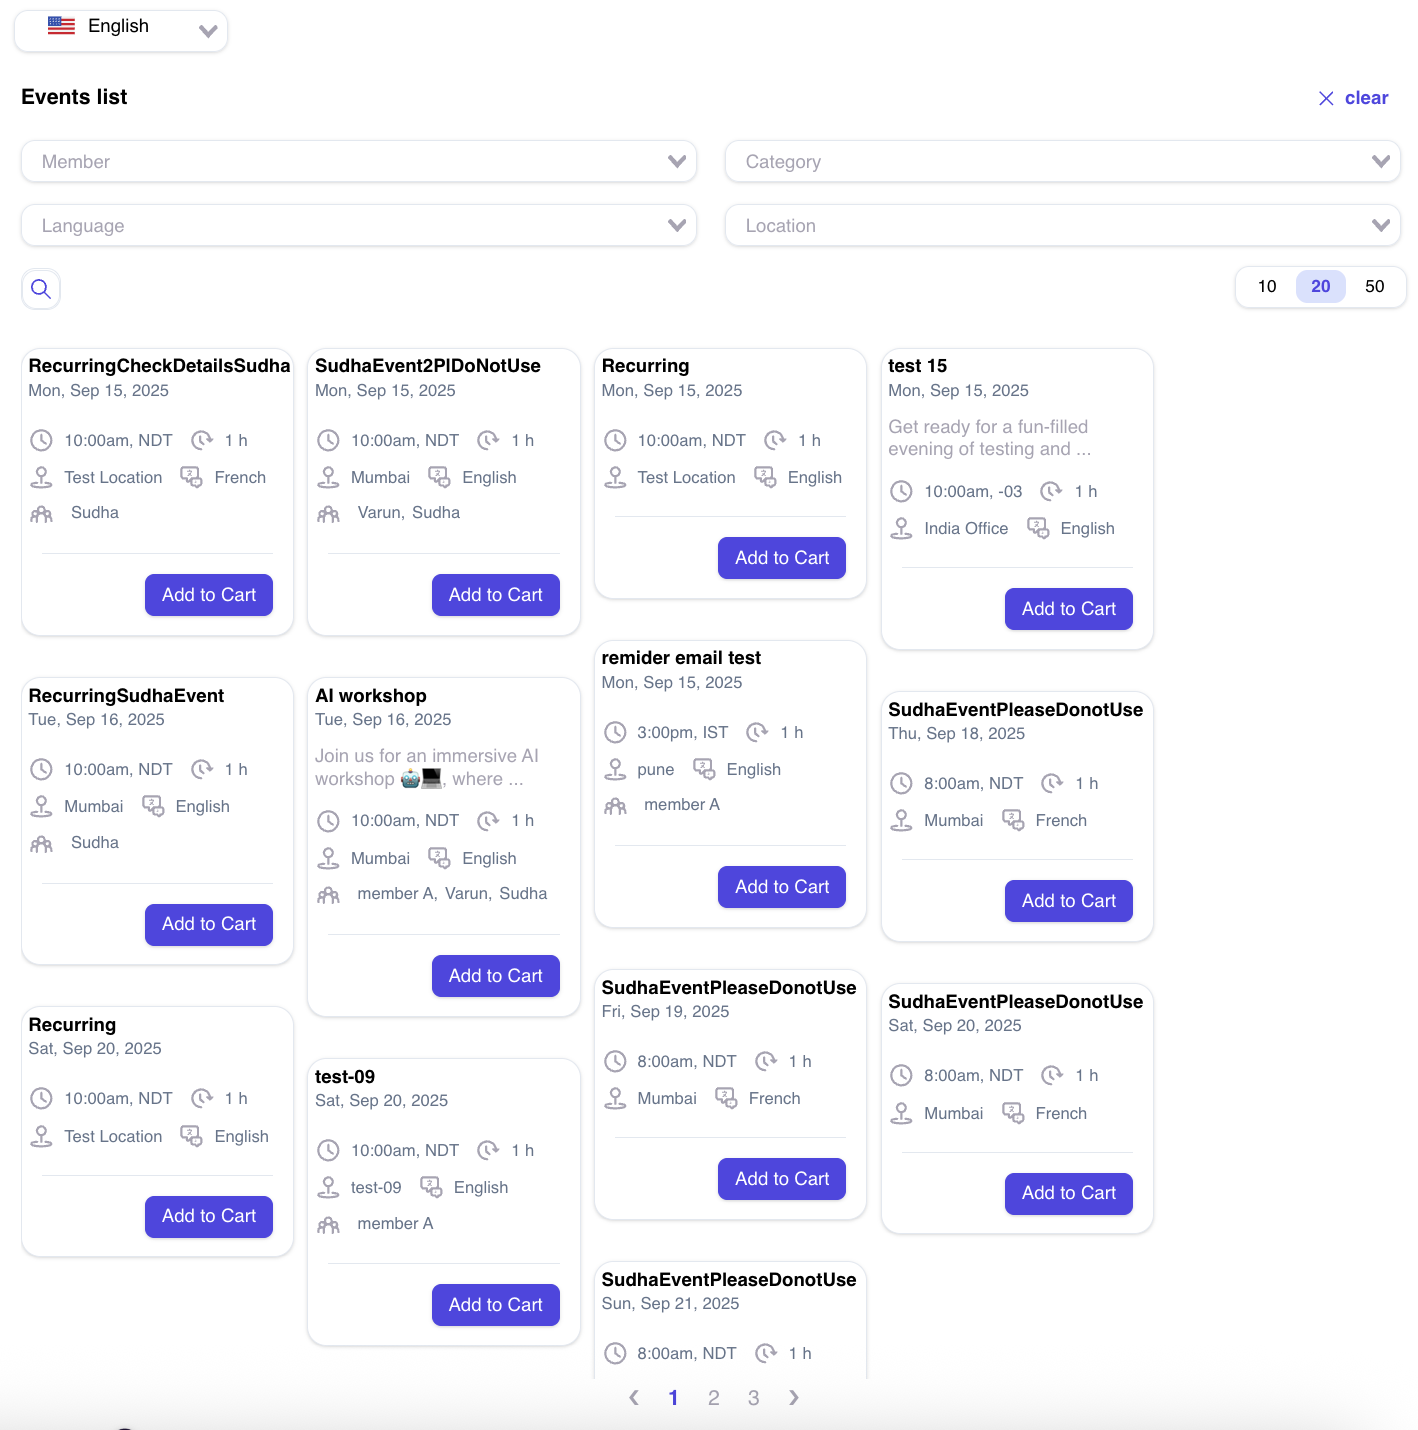
- List: Displays events in a list format.
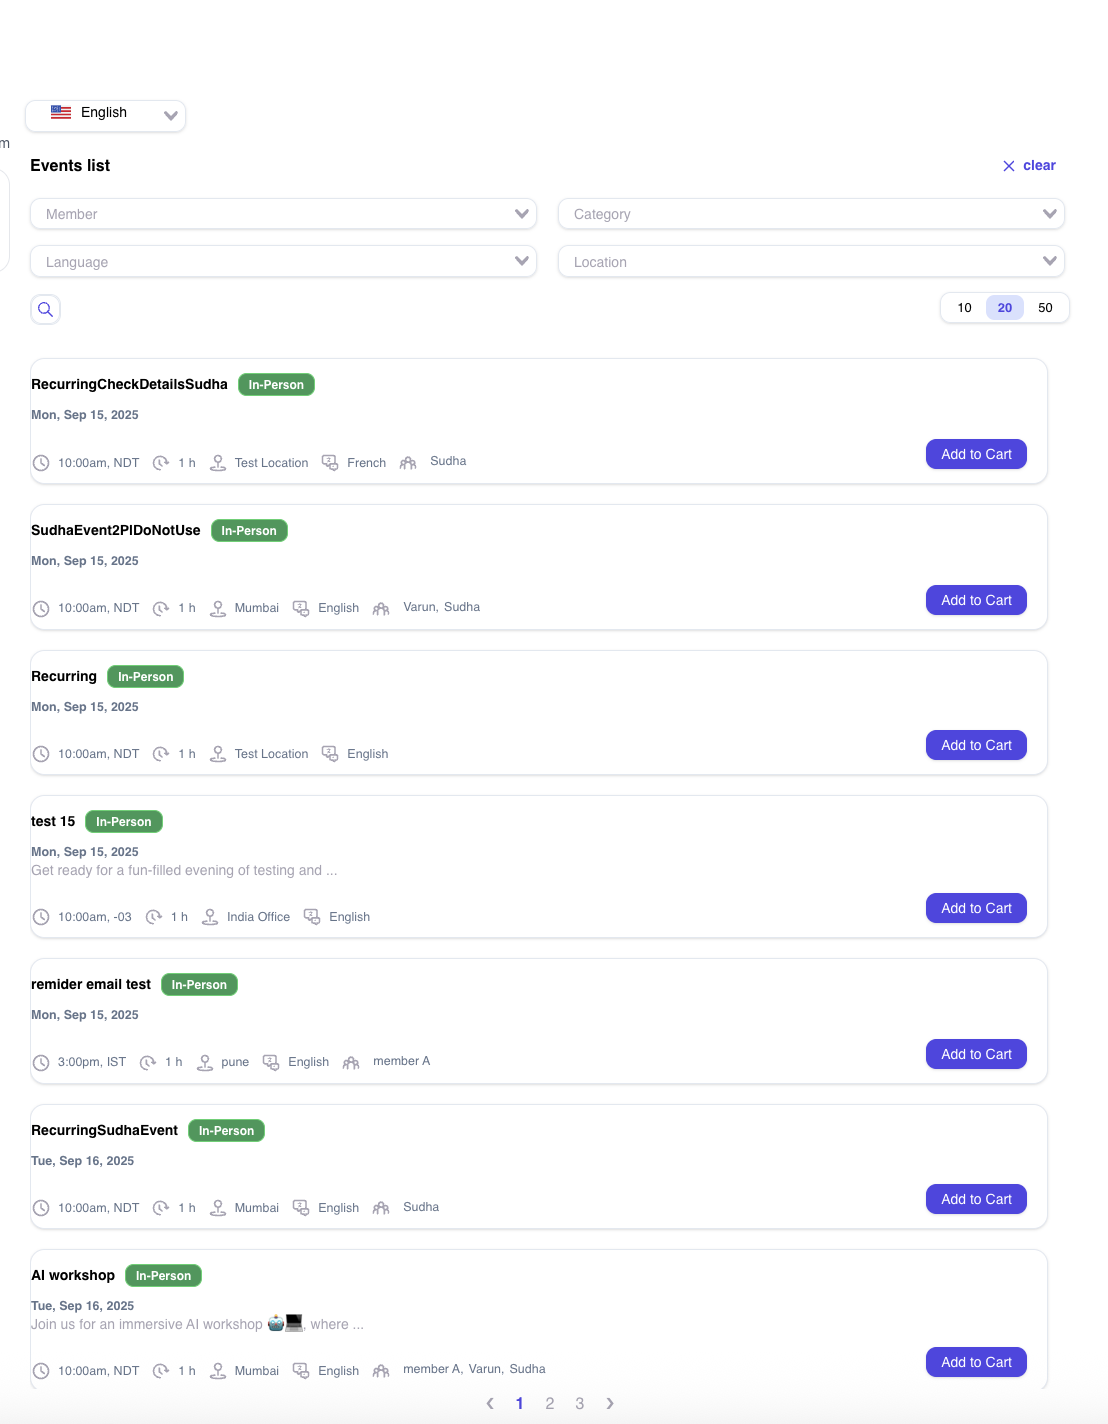
Fluid Grid Checkbox: Enable the Fluid Grid checkbox (below the dropdown menu) to make the grid layout responsive, adapting to the screen size for a seamless display.
Item Settings
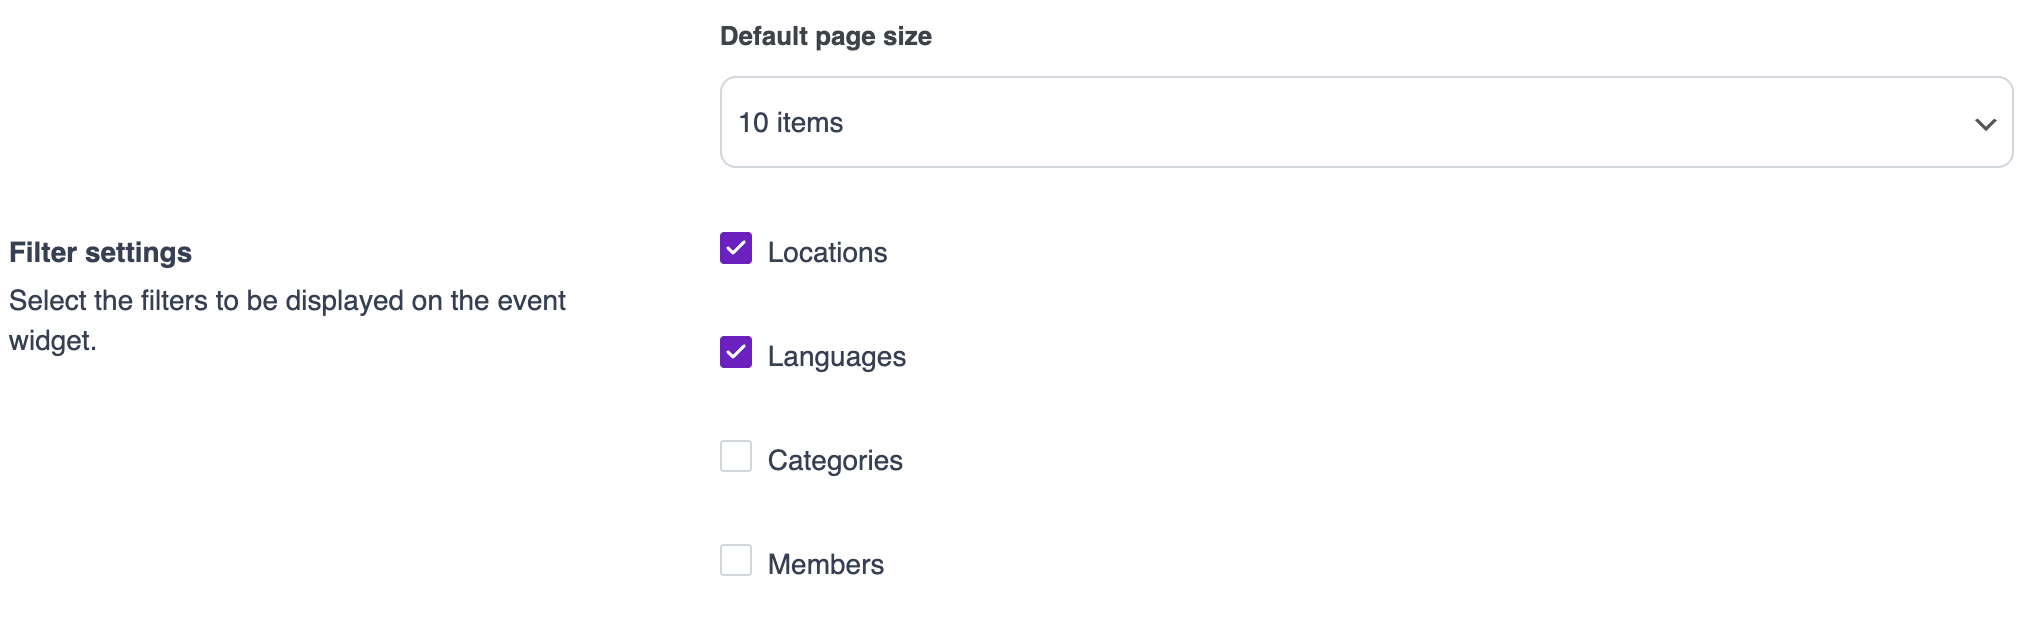
This section allows you to configure display limits and default page sizes for items in the widget.
Grid Item Description Display Limit: Set the maximum number of characters or lines to display for item descriptions in the grid layout.
List Item Description Display Limit: Set the maximum number of characters or lines to display for item descriptions in the list layout.

Default Page size: Use the dropdown menu to select the default number of items to display per page (e.g., 10, 20, 50, etc.).
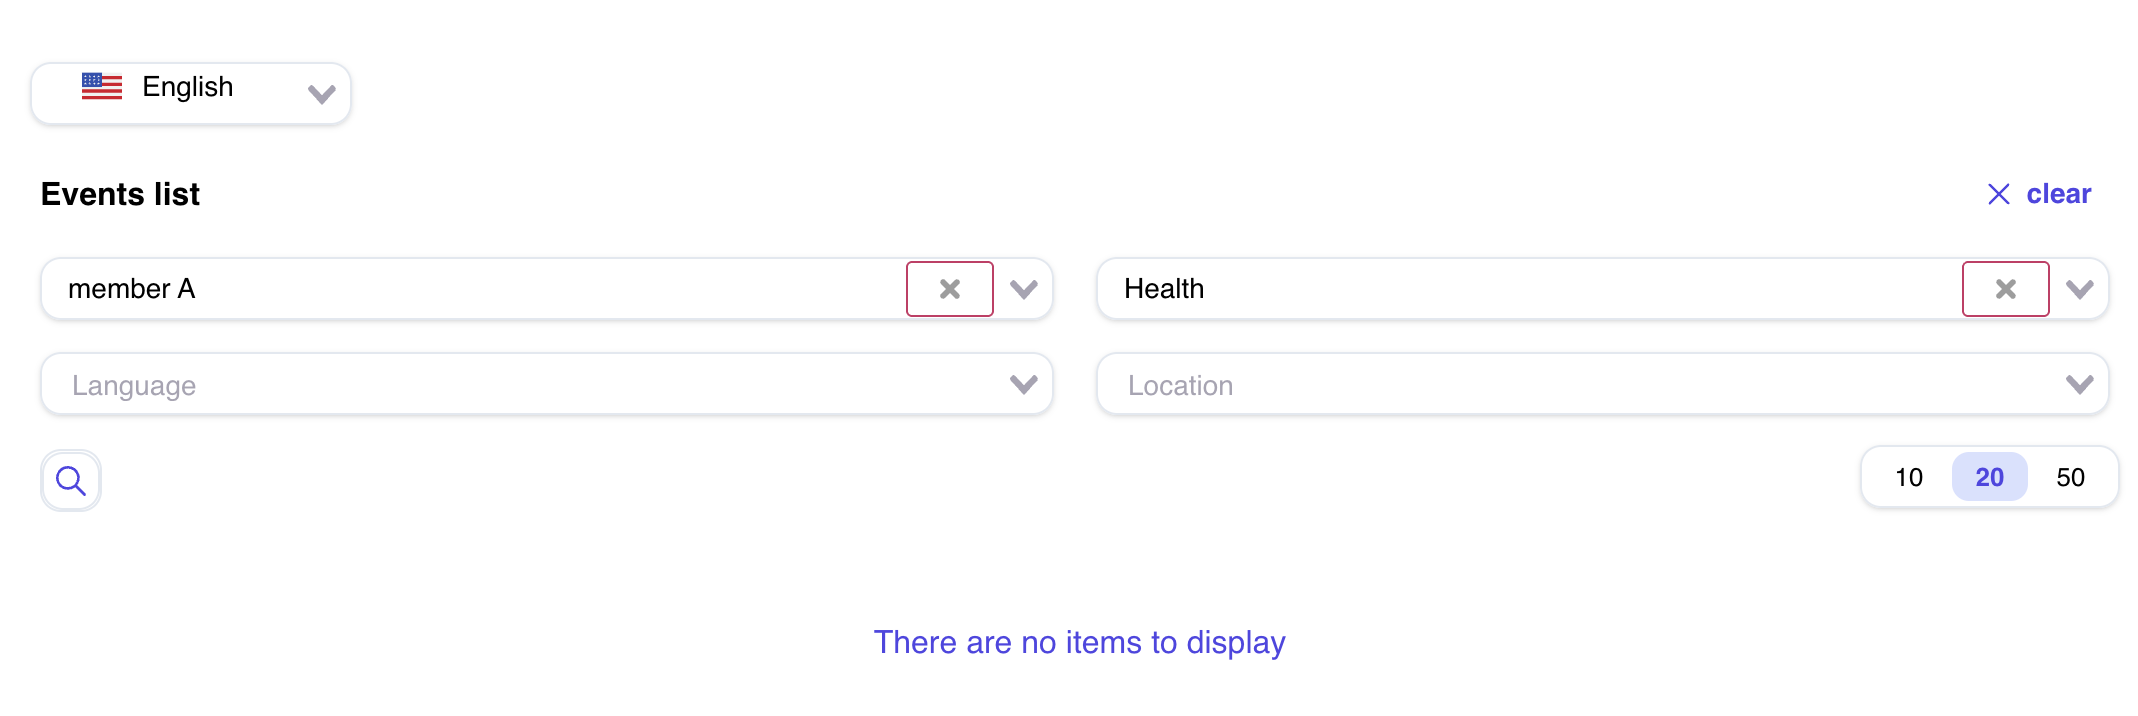
Filter Settings
This section allows you to select which filters are displayed on the event widget, enabling users to refine the events they see.
Filter Checkboxes:
- Location Filter: Displays a filter for event locations.
- Language Filter: Displays a filter for event languages.
- Member Filter: Displays a filter for event members or attendees.
- Category Filter: Displays a filter for event categories.
Usage: Check the boxes for the filters you want to appear in the event creation form. Unchecked filters will not be visible to users.
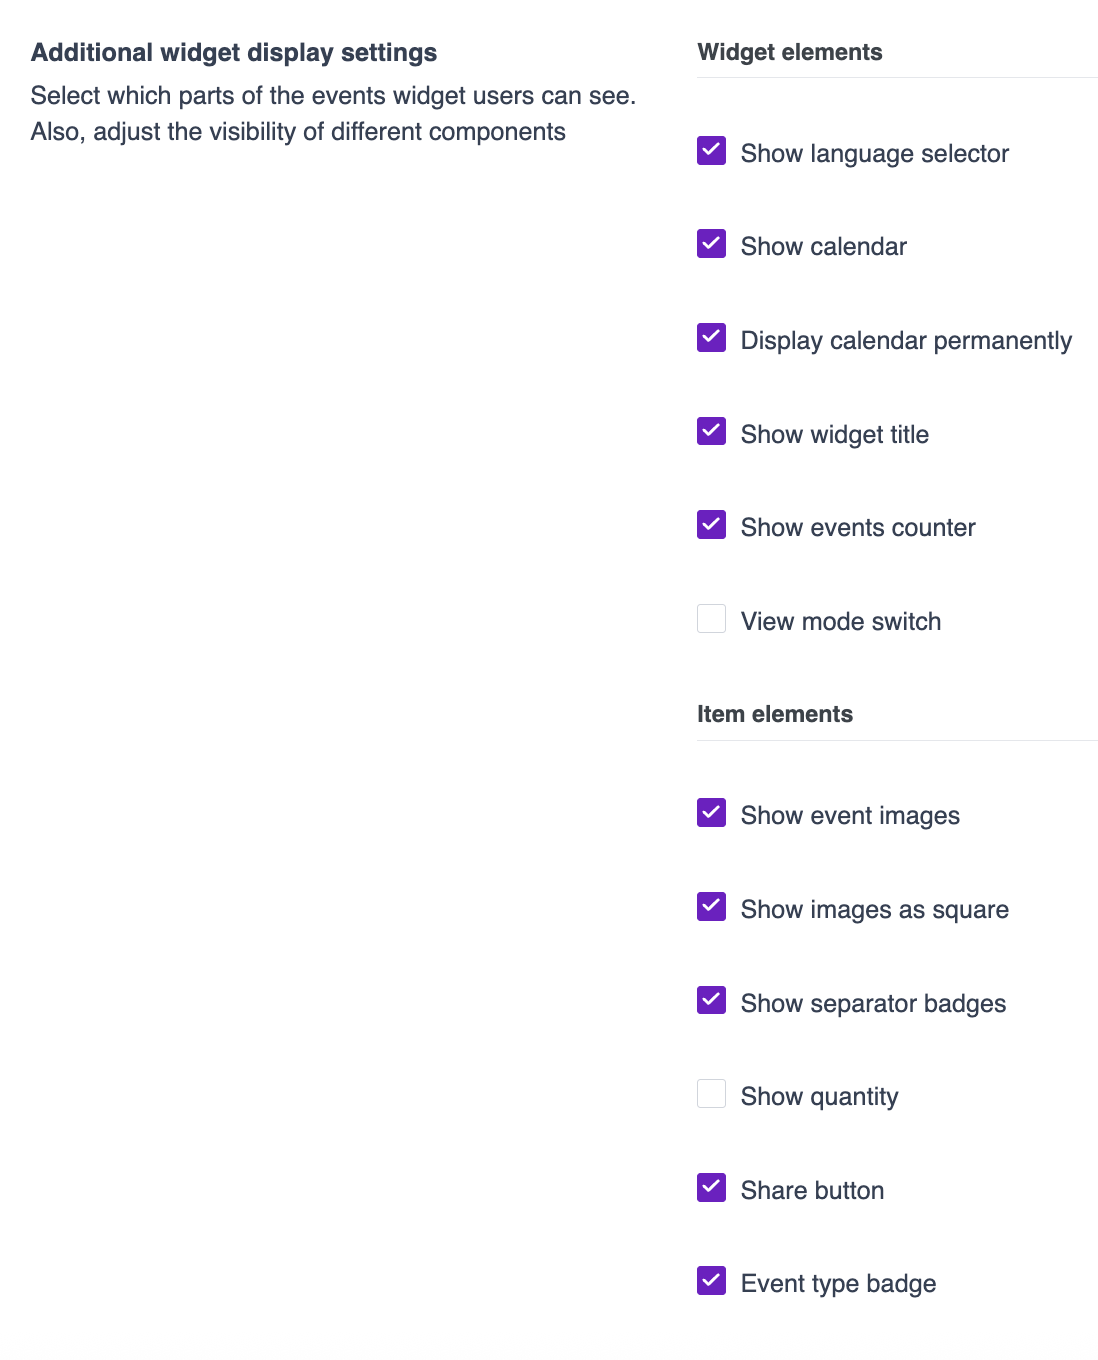
Additional Widget Display Settings
This section allows you to control the visibility of various widget components and customize the event widget's appearance.
Widget Elements Checkboxes:
- Show Language Selector: Displays a language selector in the widget.
- Show Calendar: Displays a calendar in the widget.
- Display Calendar Permanently: Keeps the calendar visible at all times (requires "Show Calendar" to be enabled).
- Show Widget Titles: Displays titles for the widget sections.
- Show Event Counter: Displays a counter showing the number of events.
- View Mode Switch: Enables a toggle to switch between grid and list views.
Item Elements Checkboxes:
- Show Event Image: Displays images for events.
- Show Image as a Square: Forces event images to display as square thumbnails.
- Show Separate Badges: Displays badges (e.g., for event status) separately from other elements.
- Show Quantity: Displays the quantity or number of available spots for events.
- Share Button: Displays a share button for events.
- Event Type Badge: Displays a badge indicating the event type.
Saving Changes
After configuring the desired settings, click the Save button at the top of the Settings panel. All configured settings will be saved and applied.
Need Help?
If you're stuck or need further assistance:
- Check our FAQs
- Reach out via Support Request Form
- Chat with us directly from your Servv dashboard
We're here to help — every step of the way.